5 Git Commands I Wish I'd Known About When I Started Coding


In my last workplace, we got by using SVN. Looking back, I don’t even know why we chose SVN. Oh wait, I know – it was one of those things that belonged to the list of the company's long-running traditions, and nobody took the initiative to change it.
Here are some of the Git commands that I have learned over the past few months. I wish I had known about them the day I started using Git :
1. git commit --amend --no-edit
Earlier, every time I forgot something, I went ahead, made changes, and pushed another commit. This is what my commit history looked like:
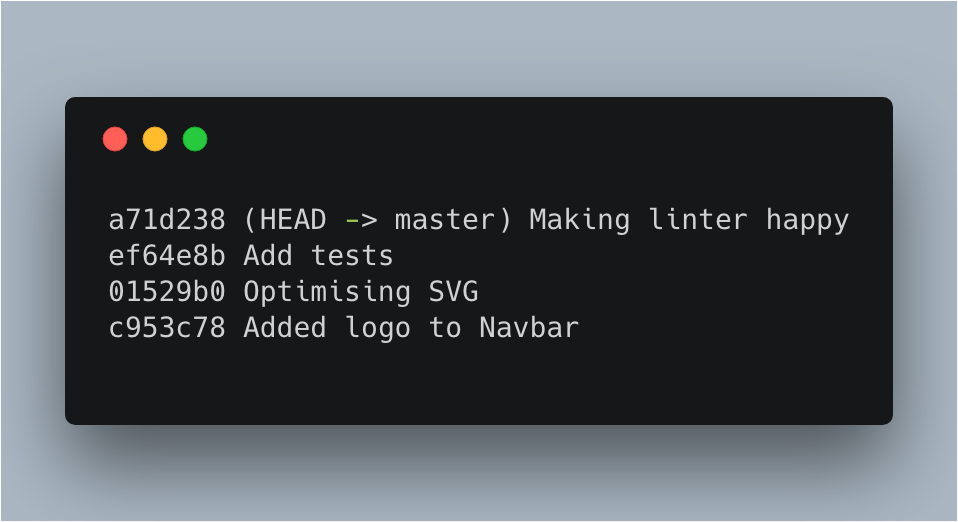
However, when you look at those commits, you promptly make it your mission to find out the person who did that. I used to be that person, and somewhere along the way, I decided to take care of that mess I was spreading all around carelessly in my repos.
Simple solution: git commit --amend --no-edit lets you add the currently staged changes to your last commit. Exclude the --no-edit option and Git will ask you whether you wish to change the commit message. This command comes in very handy for those cases when you find out that you need to make a little change after you’ve already committed your changes.
2. git rebase -i
Sometimes, while I am working on a feature, somebody else pushes code that would be useful in my current task. To get their changes, I often merge master to my feature branch. However, that may lead to a commit history that includes a few master to feature branch merges. Here comes another nifty Git command to the rescue!
Before pushing my code upstream, I run git rebase -i origin/master. This is a powerful command that lets us do loads of stuff with commits that are present in our branch.
For example, this message shows up when I try to run the above command.
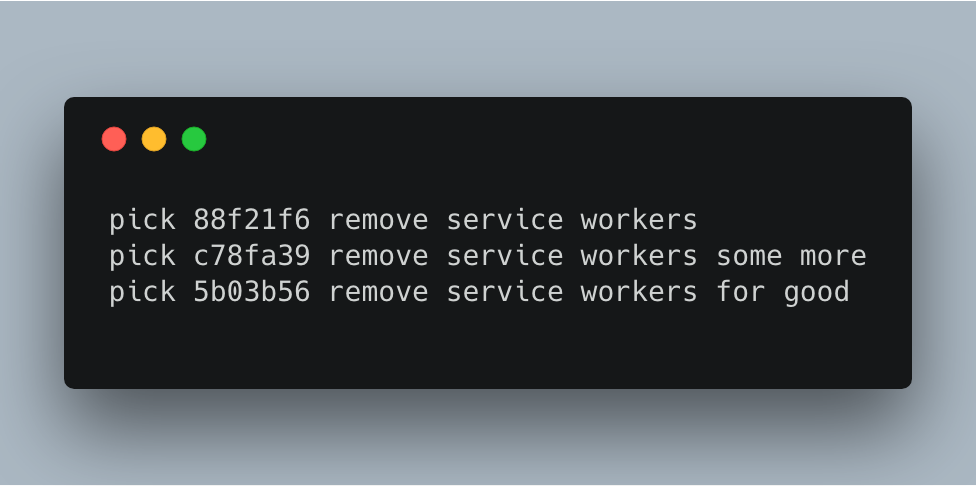
I can then edit commit log messages or squash commits (hint: squash those last two commits!). The best part: Git opens this in your editor, so operating on those commits becomes as easy as changing pick to drop (if you want to remove a commit).
3. Deleting all local branches that were merged to master
I often found myself deleting a local branch after I'd merged it to master and deleted it on Github. This was my usual flow for quite some time, and I finally got tired of doing this. Like with all things Git, of course, there indeed was a better way to do it.
git branch --merged master | grep -v '^[ *]*master$' | xargs git branch -d lets us delete local branches that were merged into master.
Let’s check what this command does :
- git branch --merged master : This command lists the branches that were merged to master.
- grep -v '^[ *]*master$' : This part of the command excludes the master branch from getting deleted. I can’t think of a scenario where you’d want to delete the master branch. Well, except when your main branch is not master, then maybe you’d want to delete master. In that case, don’t forget to replace `master` with your main branch’s name in the above command.
- xargs git branch -d : This is what actually deletes your branches.
So, instead of going through the list of branches and deleting them one by one, I go nuclear on them and get the job done in 5 seconds. Also, it would be a good idea to add that as an alias, wouldn’t it?
4. git stash
Imagine, you've just started working on a feature and suddenly have to switch branches. In such cases, I used to reach out for commit and later would amend that commit when I had more useful changes. Such a waste of commits!
git stash is a cooler way to just stash (it’s in the name!) your changes and apply them later again. Before switching branches, run git stash, then switch branches and when you’re back to the feature branch, run git stash pop and those changes will be applied to your branch.
Stashing also helps in cases where you've made changes to a different branch than the one you were supposed to. For instance, the other day, after having worked for 10 minutes, I realised I was on feature2 whereas I was supposed to making changes on feature1. I just sighed carelessly and ran these commands :
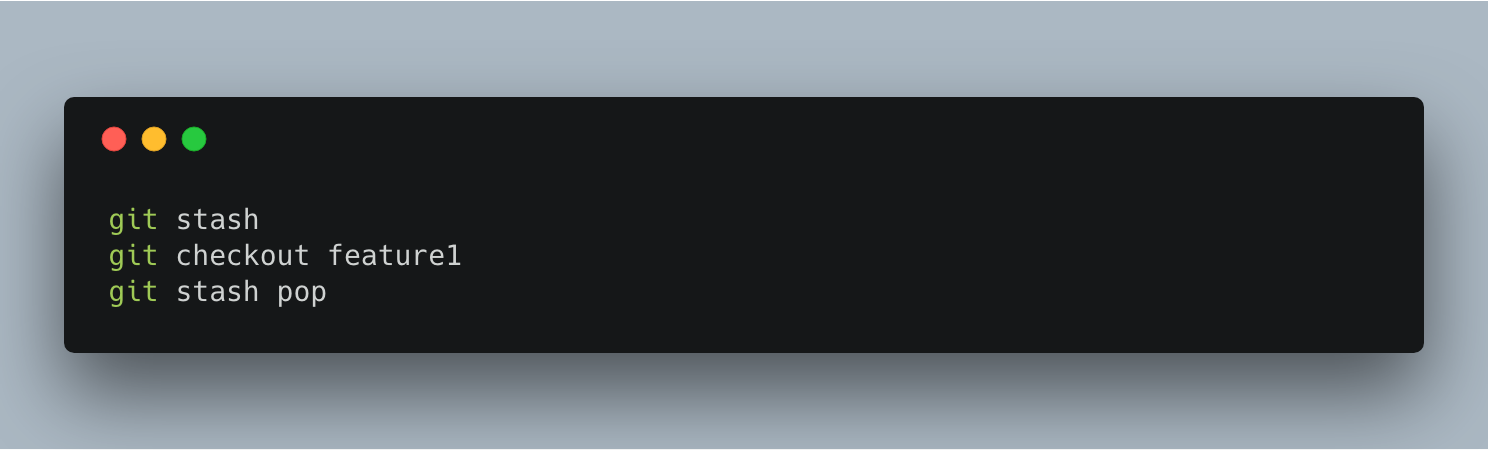
And I kept on working. Gone are the days when I used to pray to God almighty every time Git said something to me.
5. git bisect
All those weeks went by, and I didn’t have the slightest idea that something broke. No, I haven’t reached this level of mastery yet but this is a command which I found really interesting, and hence it makes the list.
git bisect uses binary search and helps us find the commit where the bug crept in. It’s a powerful, yet simple process that goes as follows:
- git bisect start : Telling Git I mean business.
- git bisect bad HEAD : Letting Git know that the bug is alive on HEAD.
- git bisect good HEAD~10 : Marking the commit which I’m sure didn't consist the bug as good.
- Now, git will pick a commit between the two I provided above and ask me whether the commit is “good” or “bad”. It will keep on going, and in no time, I can find the culprit. Now, we got to blame someone for this, right?
If you want to learn more about git bisect, Wiktor has a pretty detailed explanation in this post: Sneaky Bugs and How to Find Them (with git bisect)
Phew! And we're done. Do you know a better approach for handling any of the above tasks or know a handy shortcut I could use? Please share them in comments! :)