Introduction to HomeKit


Not so long ago such things only appeared in movies but nowadays it’s a generally available technology. We can install a window opener in your house which is connected to the Internet or smart switches and door locks which we can open with your phone.
In June 2014, Apple has announced a framework called HomeKit which allows all home automation accessories to work with iOS. Let's imagine a situation where we have some smart lights produced by company X but you have also bought some lights from company Y. Before HomeKit, we had to install and manually control each accessory using their own apps. After some time, constantly opening all these apps can become exhausting. We also couldn't connect accessories with each other to trigger some events. This doesn't sound good but fortunately we already have a solution for this type of problems – welcome to HomeKit!

Finding HomeKit-compatible devices
Before you start, you need to remember one thing you must declare NSHomeKitUsageDescription key in your app’s Info.plist to get access to user’s HomeKit configuration data. After that, just link HomeKit framework in your project.
class AddAccessoryViewModel: NSObject {
    let accessoryBrowser = HMAccessoryBrowser()
    var accessoriesList = [HMAccessory]()

    override init() {
        super.init()
        accessoryBrowser.delegate = self
    }

    func startLookingForAccessories() {
        accessoryBrowser.startSearchingForNewAccessories()
    }
}

extension AddAccessoryViewModel: HMAccessoryBrowserDelegate {
    func accessoryBrowser(_ browser: HMAccessoryBrowser, didFindNewAccessory accessory: HMAccessory) {
        guard !accessoriesList.contains(accessory) else { return }
        accessoriesList.append(accessory)
    }

    func accessoryBrowser(_ browser: HMAccessoryBrowser, didRemoveNewAccessory accessory: HMAccessory) {
        accessoriesList.removeAll { $0 == accessory }
    }
}
Discovering devices is pretty straightforward. All we need to do is to create an object of type HMAccessoryBrowser, implement its delegate methods and then call startSearchingForNewAccessories. After that, we need to implement two delegate methods – one for discovering devices and the other for removing them. In those methods we’re checking if your list contains an accessory, then we’re just adding or removing it to or from our list.
Connecting with devices
We already know how to discover those accessories. What’s next? Maybe we can just connect with them? Let’s try that!
In this snippet we’re going to configure new accessories and save them in view model.
// We need to create an object of type HMHomeManager.
let homeManager = HMHomeManager()

// Call this method with new accessory as a parameter
func configureAccessory(_ accessory: HMAccessory) {
    // First we're checking if it's a new device which wasn't already configured.
    guard !viewModel.configuredAccessories.contains(accessory) else { return }

    // If it's a new device, then we're calling function on our primary home
    // selected with the Home app which will present you a view where
    // you'll need to pass pin of your device.
    homeManager.primaryHome.addAccessory(accessory, completionHandler: { [weak self] error in
        guard let `self` = self else { return }
        if let error = error  {
            self.showAlert(title: "Error", message: "Something went  wrong while trying to add a new accessory.", style: .alert)
            print(error)
        } else {
        	// If everything is fine, then the completion handler should not return any error
        	// and you new device should be already in your home.
            self.viewModel.addeddAccessories.append(accessory)
        }
    })
}
Displaying services and performing actions
Now when we already know how to discover and configure a new device, let’s learn how to display it’s available services and to perform actions on it.
Every accessory has some services (e.g. Light Bulb, Outlet) which contain characteristics (e.g. On, Brightness). Let’s say that we want to display all services and characteristics from the accessory in a UITableView. To do that, we must first get an accessory.
//First we need to pass here our accessory.
var accessory: HMAccessory? {
    didSet {
    	// Filter accessory services to return all except service which includes
    	// information about a device beacuse it does not allow any interaction.
        if let filteredServices = accessory?.services.filter {
            $0.serviceType != HMServiceTypeAccessoryInformation
        } {
            services = filteredServices
        }
    }
}
var services: [HMService] = []

func tableView(_ tableView: UITableView, cellForRowAt indexPath: IndexPath) -> UITableViewCell {
	// We define services as sections for the table and characteristics for it's
	// rows, so next thing that we need to do is just to get the right
	// characteristic and prepare a cell for it.
    let characteristic = services[indexPath.section].characteristics[indexPath.row]
    let cell: CharacteristicCell?

    // Here I'm using a custom variable to define which cell should I use.
    // I've prepared a gist for you to speed up your implementation process.
    // You can find it under this snippet.
    switch characteristic.cellType {
        case .Slider:
            cell = tableView.dequeueReusableCell(withIdentifier: "sliderServiceCell") as? SliderCell
        case .Switch:
            cell = tableView.dequeueReusableCell(withIdentifier: "switchServiceCell") as? SwitchCell
        case .Segmented:
            cell = tableView.dequeueReusableCell(withIdentifier: "segmentedServiceCell") as? SegmentedCell
        default:
            cell = tableView.dequeueReusableCell(withIdentifier: "defaultServiceCell") as? DefaultCell
    }

    guard let unwrappedCell = cell else { return UITableViewCell() }
    unwrappedCell.setup(characteristic: characteristic)
    return cell
}
Here you can find the gist with custom properties for HMCharacteristic.
In the next snippet I will show you a quick example how to change characteristic value.
// First we need to prepare our cell.
func setup(_ characteristic: HMCharacteristic?) {
	self.characteristic = characteristic

	// We want to change characteristic value whenever UISwitch will
	// change it's value.
	switchOn.reactive
        .controlEvents(.valueChanged)
        .take(until: self.reactive.prepareForReuse)
        .observeValues { [weak self] switchOutlet in

        	// We're calling function on our characteristic with new value
            // as a parameter.
            self?.characteristic?.writeValue(switchOutlet.isOn, completionHandler: { error in

            	// Completion handler should not return error if everything is fine.
                if error != nil {
                    print("Error while writing new value to characteristic \(error!)")
                        self?.switchOutlet.isOn = !switchOutlet.isOn
                }
            })
    }
}
I recommend checking the HomeKit Catalog which is a good example project with HomeKit prepared by Apple.
HomeKit Accessory Simulator
Now you know how to implement HomeKit in your app. However, what if you’ve got no HomeKit devices to test your app? And even if you had, you wouldn’t probably want to change anything in your home automation. Don’t worry, Apple provides a great solution to this challenge – HomeKit Accessory Simulator for macOS.
We can use this app to setup and configure a simulated set of devices in any kind of Home setup we like. It’s not shipped with Xcode by default, so you need to install it by heading over to Apple's "More Developer Downloads" page and searching for “Hardware IO Tools for Xcode”.
Now, let’s open the app and try to simulate our first HomeKit device.

After launching it for the first time, we’ll see an empty Accessories section, so we need to click the + button in the bottom left corner and select New Accessory.
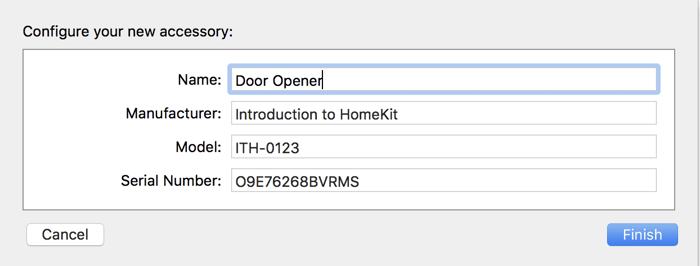
We need to fill out some field with example information. This information is not important, so you don’t need to worry about it.
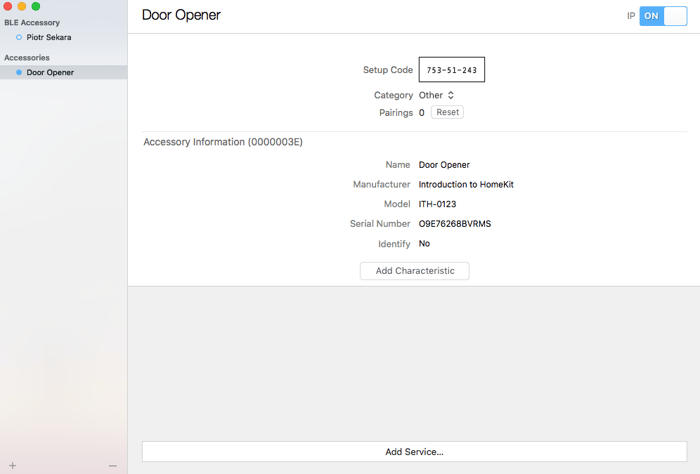
Ok, so we’ve already added our first simulated device, but we’re still missing its services – let’s add some by clicking on the “Add Service” button in the bottom.
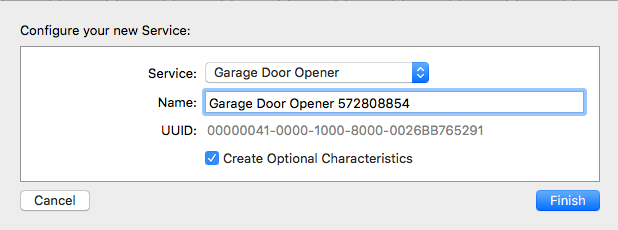
We’ll add “Garage Door Opener” service. However, you can of course select other service or even add more than one.
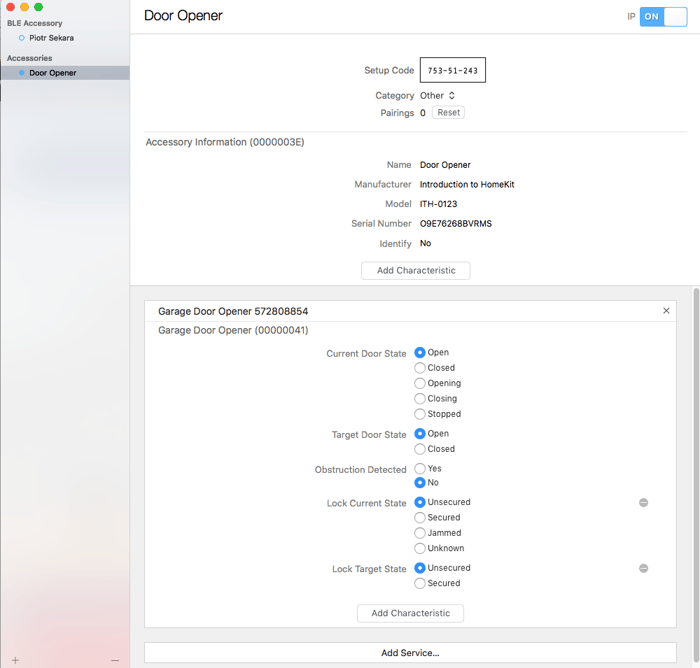
Great! Now we have a simulated device fully set up. We can open our app or Home app and just add this device. You can change all these characteristics with your phone or with simulator app.
MFi Program
We’ve already learned how to implement HomeKit in an application, as well as how to simulate HomeKit accessories. What if we wanted to build our own real device or even start selling it? Of course, this is not as simple implementation of HomeKit. Thankfully, there’s a Apple program for this.
MFi Program is a shortcut from “Made for iPhone/iPod/iPad” and it’s a licensing program for companies which want to produce their devices. When you’re in this program, you can get access to the various device connectors, full HAP (HomeKit Accessory Protocol) documentation, a beta version of HomeKit Accessory Simulator and special authorization chips among other things.
After joining the MFi program and passing a certification test you will be allowed to display MFi logos on your products.
To join this program you’ll need to provide information about your company and pass verification by a company cooperating with Apple. You’ll also need to sign NDA, provide a valid credit card and pay a verification fee.
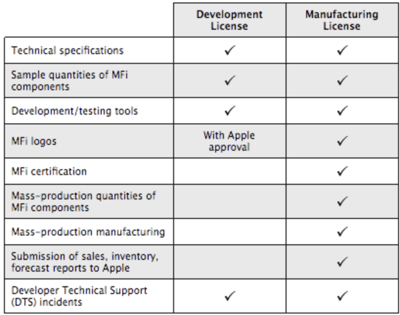
There are two types of licenses that you can get depending on what you need.
Summary
Home automation is one of the hottest topics in technology these days. This market is still emerging but there are already many devices compatible with HomeKit. It’s no longer available only to large companies – even a single developer can create their own device. You can find many tutorials on how to build DIY HomeKit-enabled devices with RaspberryPi.
I think this topic is worth following, as is watching the news on the market related to home automation. Not so long ago we could only see such things in movies, and now we can build our own intelligent homes.